“I’m just no good at cooking!”
Far too many home cooks have thrown up their hands and uttered those words. Sure, little questions or struggles are bound to pop up when you’re in the kitchen. But that doesn’t mean wonderful home-cooked meals are out of reach. Like anything in life, finding your cooking comfort zone takes practice and a little patience.
Some pro tips couldn’t hurt either! For this, we tapped two of our chefs: Tim Zintz, Director of Culinary, and Jason Lewis, Culinary Development Chef. Dig in as they offer their advice for handling some of the most common kitchen woes.
10 Common Cooking Challenges (and Solutions)
We gathered up some everyday kitchen challenges and put Chefs Tim and Jason on the case. Here’s what they had to say.
Challenge #1: What’s the right way to boil an egg?

Our experts: Chefs Tim Zintz (left) and Jason Lewis
The Solution: Whether you like your eggs hard, soft, or in between, you can never quite tell what’s going on inside that shell. The remedy is actually a controversial topic in the culinary world, with a couple schools of thought.
Chef Tim says to place your eggs in a pan and cover them completely with cold water. Bring the water to boil over a stove. Once boiling, cover the pan and remove it from heat. Set your timer for the desired level of doneness: 4 minutes for soft-boiled, 6-7 minutes for medium-boiled, and up to 12 minutes for hard-boiled. At this point, place your eggs in ice water to chill.
Chef Jason offers an alternative: Take cold eggs straight from the fridge and drop them (gently) into already-boiling water. Cook the eggs for 10 min, then immediately plunge them into ice water and cool for at least 5 minutes. “I find this method yields hard-boiled eggs that are easier to peel,” he says.
Either way, if your eggs are green on the inside, that means they are overcooked. Next time, try boiling them not quite as long.
Challenge #2: How can I cut an onion without crying?
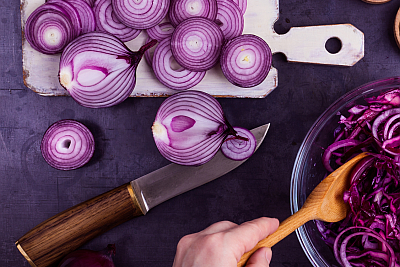 The Solution: Onions appear in so many dishes — but they bring too many people to tears. There are a couple ways to tackle this problem, according to our chefs.
First, treat the waterworks at the source by storing your onions in the fridge. “Cold onions will not make you cry nearly as much,” Chef Tim explains.
Also make sure you’re working with a sharp knife.
“A dull knife will smash the cell walls of the onion, allowing the sulfuric liquid inside to blast into the air. That’s what makes your eyes water,” says Chef Jason. “However, a sharp knife will slice right through.”
If these tips still don’t do the trick, wearing protective goggles really does work. (We promise not to laugh!)
Challenge #3: How can I chop hard vegetables safely and evenly?
The Solution: We get it. You want to eat your vegetables without hurting yourself in the process. The key here is to create a flat surface so your sweet potato or butternut squash doesn’t roll away from you as you cut.
Start by trimming off any rounded ends or edges so the vegetable can sit firmly on the cutting board. Then slice it to your desired size, restacking as needed to make smaller cuts or dices.
Another idea: If you’re going to be cooking them anyway, put the veggie in the microwave on high (be sure to pierce the skin in a few places first) to soften a bit before you slice.
Challenge #4: How can I tell when meat is done, without cutting into it?
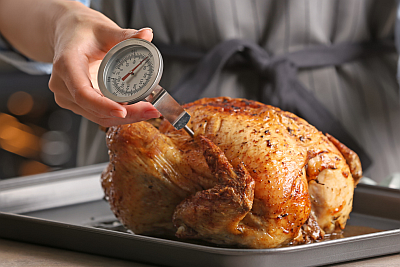 The Solution: Cooking meat to the right level of doneness is a matter of taste—but also one of safety, as undercooking can put you at risk for food-borne illness.
It’s worthwhile to invest in a meat thermometer, available for as little as $10 to $15 at many grocery stores or online retailers.
“A meat thermometer is the safest and most accurate way to check the temperature of your food,” attests Chef Tim. “From a burger on the grill to the Thanksgiving turkey, you can be confident your food is the right temperature.”
(See this chart for safe minimum cooking temperatures of common foods.)
Challenge #5: My fish just never turns out right.
The Solution: Delicate fish is prone to overcooking and falling apart. But don’t let that stop you from serving heart-healthy seafood at home.
If you’re grilling, preheat your grill to medium-high and make sure the fish is well oiled to prevent sticking (rubbing down the grates helps too).
Season the fish, then cook for 2-3 minutes per side. Let your food rest for 2 minutes before serving. Follow the same process on the stovetop, preheating the pan at medium-high.
If you choose to bake your fish, preheat the oven to 425 degrees. Season, then place the fish on a sheet pan. Most filets will be done in 8-10 minutes. No matter your cooking method, use that trusty food thermometer to check the fish has reached 145 degrees.
Challenge #6: My food always seems to stick to the pan. What am I doing wrong?
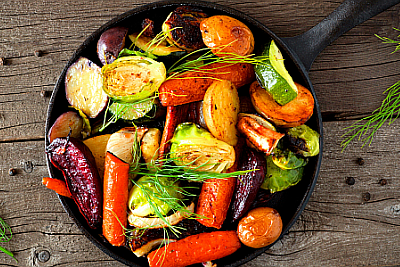 The Solution: When food sticks, it sure can ruin the presentation, not to mention your cookware. The fix depends on the type of pan you’re using, our experts explain.
If food sticks to a cast iron pan, it could be that the pan wasn’t seasoned properly or wasn’t hot enough (never add food to a cold pan). Using cooking oil can also help prevent food from sticking.
If you’re using a nonstick pan, such as Teflon, it may be past its prime.
“Once the nonstick layer wears away, you need to replace your pan to avoid any chemicals leaching into your food,” Chef Jason says.
Challenge #7: Boiling water takes forever.
The Solution: Life’s busy, so who has time to wait around for water to boil? Truthfully, you can only shave off so much time here — we’re talking science, after all — but Chef Tim offers a few ways to speed things up.
Using a shallower, wider pot will increase your surface area with the stovetop and help water boil faster. For a head start, fill your pot with hot tap water, and cover it with a lid to help retain the heat.
“Finally, you can always walk away, but not too far, and distract yourself with another kitchen task for a few minutes,” says Chef Tim. “As the old saying goes, a watched pot never boils!”
Challenge #8: My pasta comes out all wrong.
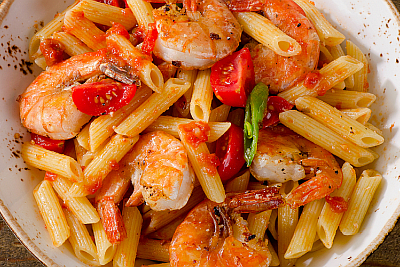
Get the Recipe: Spicy Shrimp & Penne
The Solution: Perfectly cooked pasta should be al dente, which means “to the tooth.” It should have a little bite to it but not be hard or crunchy. On the other hand, a mushy texture is a sign your pasta has been overcooked.
To solve for this, use a large pot so your pasta has space to move around during cooking. Make sure the water is at a rolling boil before you add anything to it. Once you add your pasta, stir until the water returns to a boil.
Cook for the number of minutes designated on the box (which will vary by pasta shape), stirring occasionally to keep it from sticking together. Sample a piece or two before draining.
Hot pasta is great for warming up sauces and melting any cheese you put on top. But if you don’t plan to use your noodles immediately, Chef Tim recommends giving them a quick rinse in cold water to stop the cooking process. That way, they’ll still be perfectly cooked later on when you make your pasta salad or other refrigerated dish.
Challenge #9: My rice is nothing like what I get in a restaurant.
The Solution: When cooking this versatile side dish, you want grains that are tender but not clumpy, not too wet or too dry. But this balance can be difficult to achieve in the kitchen.
Chef Tim offers his formula for making perfect rice, every time, starting with a ratio of two parts water to one part rice. Again, you want to use water that’s at a full boil. Once you add the rice, stir once, then let the water come back to a boil.
Reduce the heat, cover, then simmer (12 minutes for white rice and up to 45 minutes for brown rice, which we love). When time’s up, remove the pan from your heat source and let it stand for 5 minutes. Fluff your cooked rice with a fork and you’re good to go!
Challenge #10: I’m cooking for one or for a crowd. How can I adjust recipes to fit my needs?
 The Solution: You want to make enough food to go around without being inundated with leftovers (call it too much of a good thing). But scaling recipes up or down can require some serious math. And how can you be sure the dish will still turn out as intended?
Take the guesswork out of the equation with our Just4U PrepWizard tool, which allows you to adjust the number of serving sizes for any Feed Your Potential 365 recipe.
If you’re not using our PrepWizard tool, and do wind up with extra portions, Chefs Tim and Jason recommend storing them in the freezer so you always have meals on hand for a busy week.
Challenge Accepted
We hope our chefs’ tips empower you to overcome any challenges that might crop up in your kitchen. Each culinary victory will increase your comfort level, building a path to confident everyday cooking.
Note: Since everyone’s health history and nutritional needs are so different, please make sure that you talk with your doctor and a registered dietitian to get advice about the diet and exercise plan that‘s right for you.

